 There are many methods and tools you can use for resizing images for the web and whether you use an online tool such as Cropp.me or photo-editing software like Photoshop the output should be the same – an image that is reduced in pixel size and compressed to a file size suitable for online viewing. This guide to resizing images will show you the simplest way to prepare images for the web using Photoshop.
Please note: This method is different from the one used for resizing images for print.
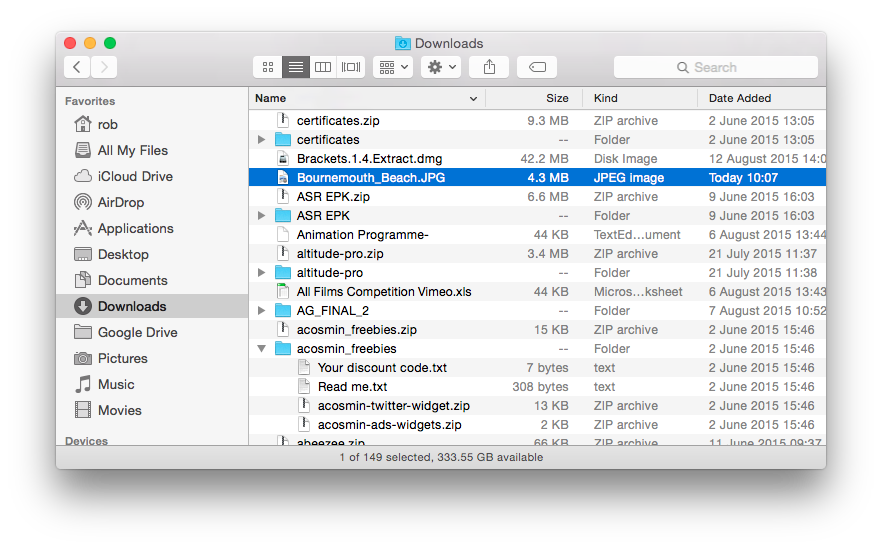
First you need locate your file in the Finder window (this guide is assuming you are using a Mac in uni) – as you can see the file size of the image we’re using is currently 4.3mb – too big for online.
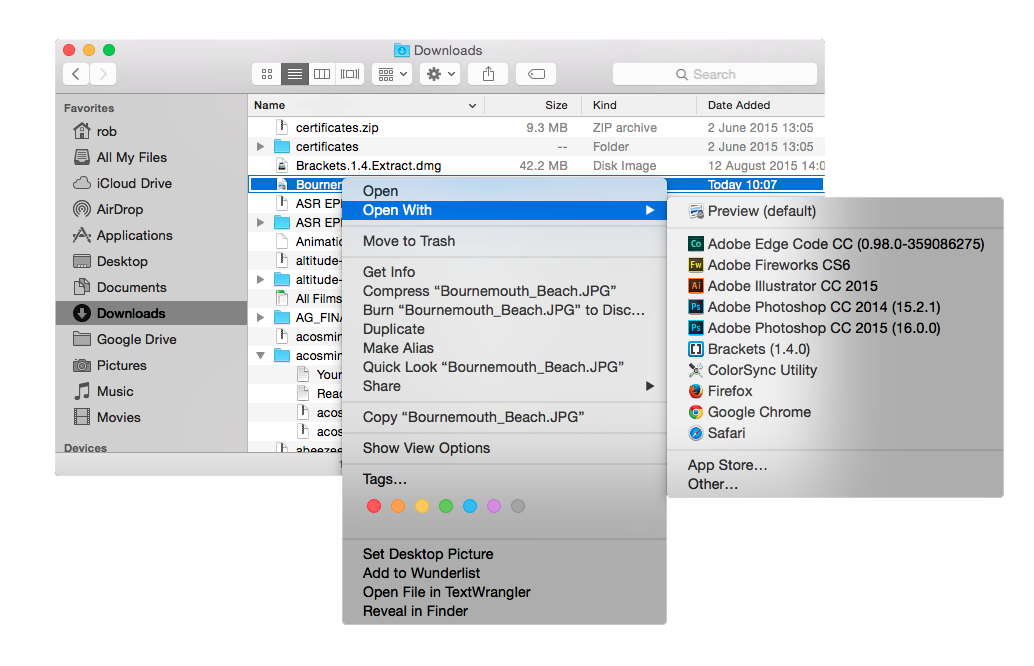
From the Finder window you can open your image in Photoshop. Hold down the Ctrl key and click on the image (or right click if you have the option). From the pop-up menu choose the option Open with
From the selection of software that appears in the next pop-up menu, choose the latest version of Photoshop.
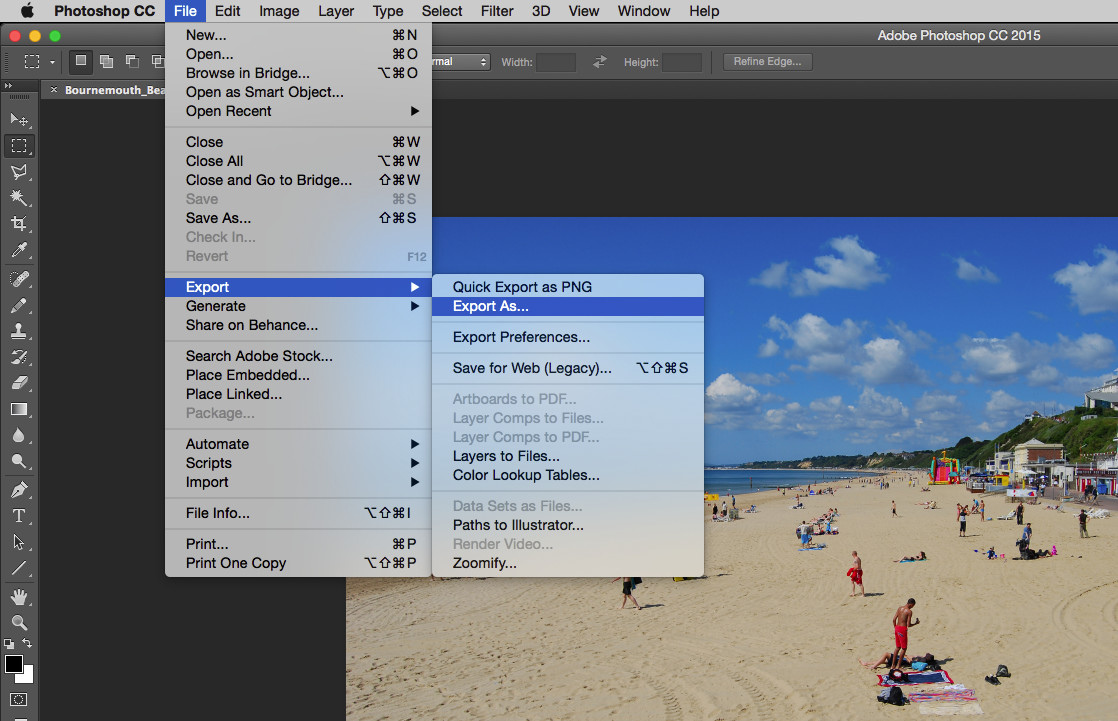
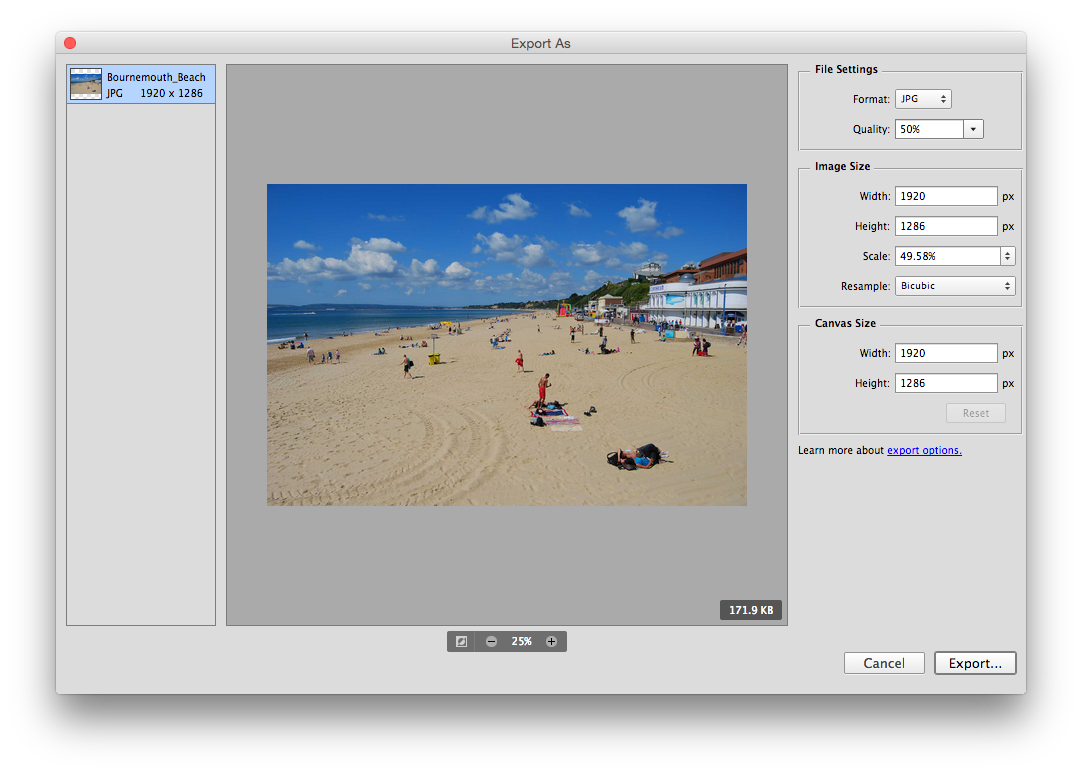
Now your image is open in Photoshop, go to the File menu and select Export > Export As…
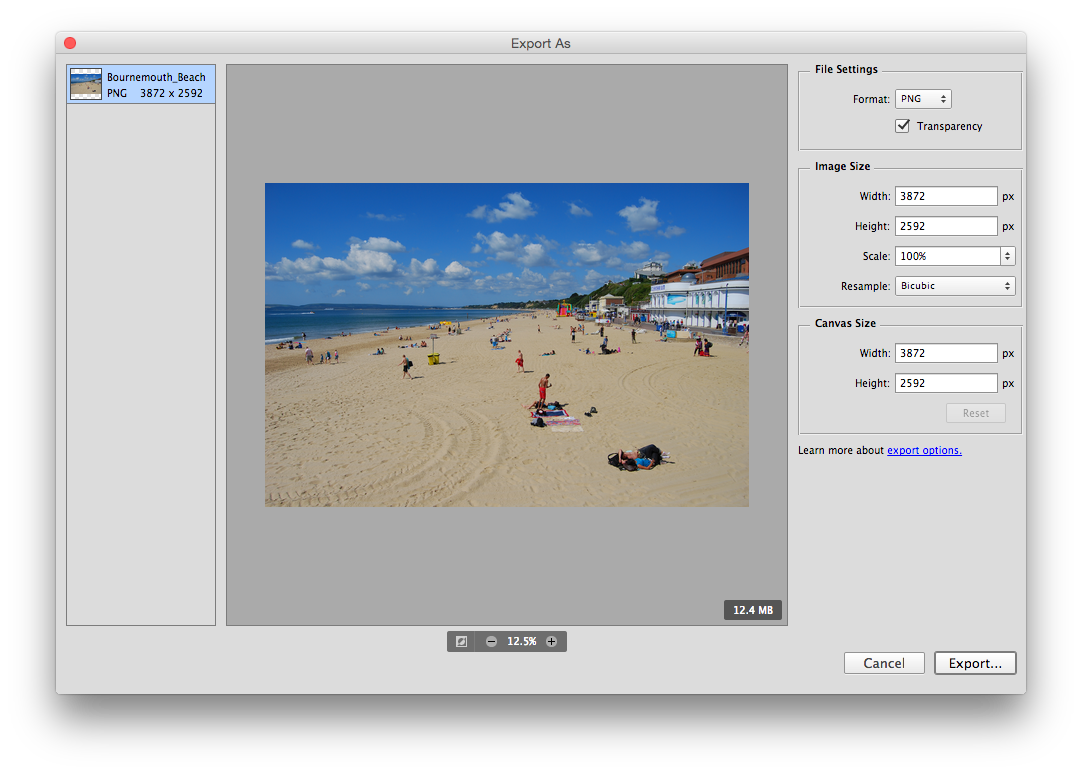
To alter the dimensions of your image adjust the width or height fields in the Image size section – changing one should automatically change the other as not to alter the image’s aspect ratio. When working with images online we always work in pixels (or ‘px’) as the images will always be displayed on a screen.
Once you’ve selected your file type and image size, click on the Save button.
In the bottom right corner, just below the image you can see that the new file size is 171kb – perfect for online. BUzz won’t accept any images over 500kb.
You can now click on the Export button
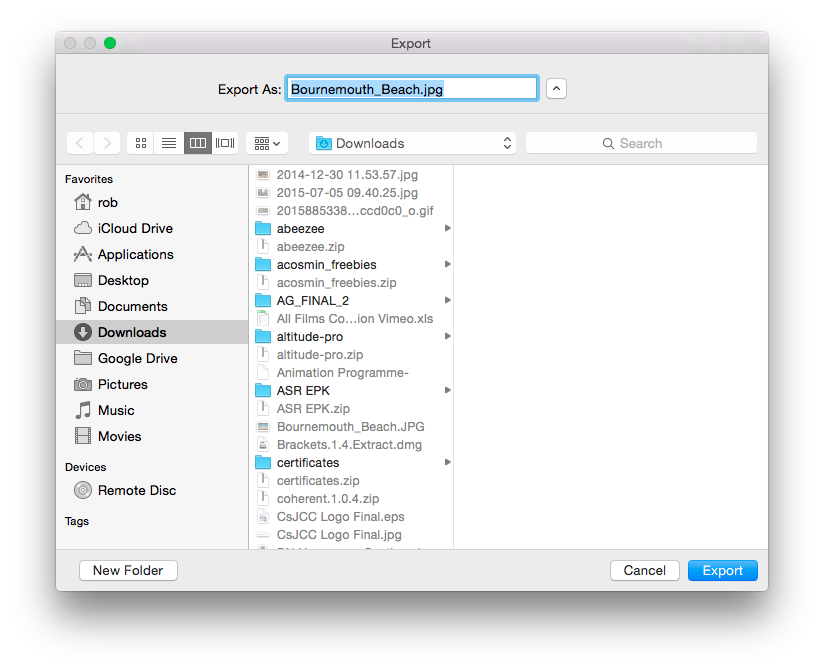
Finally, choose a destination for your file to be saved – it is always important to pay attention where you are saving your file and what you are calling it, otherwise you may struggle to locate it.
You file is now ready to be uploaded.


